Monday, December 20, 2010

Scrapdango Cards

These are two cards I made with the December Spice kit from Scrapdango. I have one more that is a gift card holder tutorial that will be in the newsletter that I'll share later.


Saturday, December 18, 2010

More Scrapdango Projects

Here are some more layouts done with the December Spice kit from Scrapdango.


Thursday, December 16, 2010

Ornament Tutorial

My tutorial this week at the Scrapbook {Express}ions blog is for this ornament.


Start with a chipboard circle (you can buy these in craft stores as coasters or pick one up for free next time you're out to dinner somewhere). Cut rectangles out of pattern paper 1-1/2" x 2-1/2".


Place the rectangles on your cutter and trim into rectangles.


Ink the edges of your rectangles (I used Creamy Brown Chalk Ink and Aged Mahogany Distress Ink). Put some Glossy Accents on your chipboard circle and start adhering the trianges with the centers slightly overlapping. Your rectangles will hang over the edge of the chipboard circle.


Roll over the rectangles with a brayer to make sure they are well adhered.


Trim the extra paper with a craft knife or your scissors (I am dangerous with a craft knife, so I just use my scissors).


Place a loop of ribbon on the back of the chipboard circle, adhering with Glossy Accents. Adhere another piece of pattern paper over the back of the chipboard circle and trim. Ink the edges on both sides of the circle and the chipboard edge itself.


Cut letters from corrugated paper (just an old box that I tore off one side of the cardboard) or cardstock. Ink the letters. I found it easiest to put some ink on my craft sheet and rub the letters into the ink.


Adhere the inked letters to a die cut circle of pattern paper. Add Glossy Accents to the letters (I "borrowed" this idea from one of Tim Holtz's Christmas Tags).


Put some Glossy Accents in a circle shape in the middle of the front of the ornament. Lay the gold trim down in a circle (I found it helped to snip between each section to get the trim to lay down flat).


Place some foam circles in the middle of the gold trim and adhere the "joy" circle once the Glossy Accents have dried.


Be sure to link up any projects you make inspired by this tutorial.

Wednesday, December 15, 2010

Scrapdango December Reveal

It's time for the December kit reveal at Scrapdango. I worked with the Spice kit this month which contained papers from the WeRMemory Keeper's Merry January line. Although this line is a winter line, it is very versatile and can easily be used for non-winter projects.

Since it's a winter line, I'll show you my winter layouts first. I printed some photos from my polar bear trip that I hadn't scrapped yet.


Be sure to check out the gallery to see what the other designers have created with this kit and the Sugar kit.

Monday, December 13, 2010

Color Challenge

I'm a little late posting this here, but last Thursday's challenge at the Scrapbook {Express}ions blog is to use blue on a layout or card. Your project does not have to be monochromatic, but it should be predominantly blue. I thought the Bo Bunny Midnight Frost Collection would be perfect for a blue challenge. I know a lot of us have received some snow recently so this is a perfect chance to use those new snow photos. Of course, if you’re still working on summer layouts, you’re sure to have some photos with blue water that would also work well with this challenge. Can’t wait to see all the blue projects filling the gallery.


Your Challenge: Create a traditional paper layout (8×8 or larger) or card (A2 or larger) that is predominantly blue.

Scrapbook Express will be giving a $25 gift certificate to one lucky participant from this month’s challenges. This is the second challenge for the month of December. There will be 4 challenges this month. Members can submit one entry per challenge giving them up to four chances to win the $25 gift certificate. The winner will be announced on Friday, December 31st, 2010 as a New Year’s surprise. Projects must be new for this challenge. Projects cannot be combined with any other Scrapbook Express forum challenge. By submitting to the challenge, participants give the right to the Scrapbook Express Blog team to post pictures of their entries on the winning announcement post.

Participants must have a Flickr.com account (it’s free) and will need to join the Scrapbook Express Flickr group. Participants should upload their projects and tag them with the corresponding challenge date seDEC9. (It’s important that it is tagged). View the projects, chose “Send to Group” then “Scrapbook Express”.

Participants will have until the following Wednesday at midnight MT (Dec. 15th for this challenge) to upload entries for the current week. In order for a gift certificate to be given, there must be at least 15 different entries for the month.

Thursday, December 9, 2010

Paper Strip Flower Tutorial

I posted this tutorial on the Scrapdango Blog but thought I would share it with you here too.

This fun flower is made from the paper strips on the Crate Paper Restoration papers in the Scrapdango November Sugar Kit. I thought it was so nice that the strips you cut off on these papers actually had patterns on them and it seemed a shame to throw them away.


Start with cutting off all the 1/4" strips from the pattern papers (I decided to do them all at once so I could save them all).


Cut the strips into 3" pieces and punch a circle from some scrap paper (this will be used as the base). This produced an approx. 3" flower. Not all the strips were the exact size so it gave it a less uniform look. You could make the strips whatever size you want your flower to be.


Start adhering the strips on the circle base forming into a flower-type shape. You can layer as many as you want. The middle where they all intersect gets a little thick if you use too many.


Punch a hole in the center with a Crop-A-Dile and insert a big brad (punching the hole takes down some of the depth in the center). Crumple your flower and ink a bit on the edges if desired. I decided to add another cricle cut from the Restoration papers to the flower before the brad for a layered look.

Now adhere to your project.

Wednesday, November 17, 2010

Scrapdango DT Revel

It's the time of the month for the design team at Scrapdango to reveal their projects. I worked with the Sugar Kit featuring the Crate Paper Restoration line. Here are my projects:


I used the scraps on my table after making my other projects for these two mini cards.


You can see the rest of the design teams projects, including the projects made with the Spice Kit, here.

Friday, November 12, 2010

Scrapdango Blog Hop Crop

The Scrapdango Blog Hop Crop has started. I am excited to be part of the new Design Team at Scrapdango, and we want to help you get to know all of the design team members and to get some great challenges along the way and have a chance to win a wonderful prize of one of Scrapdango's awesome kits.

How it works: Follow the order of the blogs of each design team member given below. At each blog you will find a list of that designer's favorite scrappy things and a few fun facts about them as well. Your challenge is to use 5 of those scrappy things in your layout and incorporate 2 of the fun facts as well. You get 1 draw for using the 5 favorites and 1 draw for using the fun facts. If you do this for everyone's blog...that is a total of 12 draws! International members welcome to play; however...a $7.50 shipping credit will be given. Any shipping above the $7.50 will be the member's responsibility.

You can earn extra draws by:
1. Posting comments on all 6 design team member blogs.
2. Inviting a friend that actively participates in the hop (they should leave a comment saying who invited them)
3. Posting on the Scrapdango forum something you learned about each DT member from their blog

Once you have completed the challenges, you can provide a link to your project by posting a comment here. Be sure to tell us how you interpreted the fun facts and what scrappy products you used. All projects are due by midnight EST on Friday, November 19th.

Some fun facts about me:
I used to teach cooking classes
I love to travel and do it often
I am a part-time SAH(cat)M
I am an avid reader
My favorite beverage of choice is wine

My Favorite Scrappy Things
Buttons
Sewing
Pattern Paper
Flowers
Jouraling Spots
Ribbon/Trim
Letter Stickers
Jewels/Bling
Kits
Ink

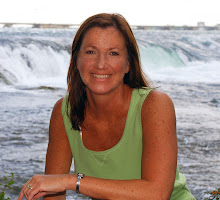
Here's my layout. I used a photo of me and my cat on vacation for my two facts and for scrappy supplies I used pattern paper, flowers, journal spot, trim, letter stickers


Here's how you should hop:
Scrapdango Blog

Audra
Celeste - You Are Here
Heather <<<-------------You Go Here Next
Laura
Lynn
Sandi

Wednesday, November 10, 2010

Scrapdango Blog Hop and Toot

I am excited to say I was recently selected to be on the design team at Scrapdango. Come on by and check out the great kits and fun and friendly message board.

We're having a blog hop crop (try saying that quickly 10 times) starting on Friday, Novemeber 12. Hope you can join us and get to know the new design team plus participate in our crop.

Thursday, October 28, 2010

Layouts

While I've mostly been making cards this month, here are a few recent layouts that I haven't posted here yet.


Saturday, October 23, 2010

Saturday, October 16, 2010

WCMD Cards

My Sketch World and Scrapdango have been having card challenges for World Card Making Day. Here are some of my favorite cards that I have completed.


Friday, October 15, 2010

Scrapbook {Express}ions Challenge

It's Thursday and that means time for another challenge at Scrapbook {Express}ions blog. This week that challenge is fussy cutting. While this is not a new technique, it is fun to look at your pattern papers and find something that can be cut out and used on a layout or card. If you are not familiar with fussy cutting, it means to cut shapes from paper that take into account the paper’s decoration or pattern. I cut the shape from My Mind's Eye Lost & Found Collection: Dictionary Glittered Paper and used it on a card.


My Mind's Eye Lost & Found Collection: Dictionary Glittered Paper
Making Memories Velvet Flower Findings, Mini Nature Collection Findings
Bo Bunny Seafoam Double Dot Cardstock
Clearsnap Fluid Chalk Ink: Dark Peony
Ribbon, Doily, Glimmer Mist

Challenge: Create a traditional paper layout (8×8 or larger) or card that contains at least one fussy cut element.

Scrapbook Express will be giving a $25 gift certificate to one lucky participant from this month’s challenges. This is the third challenge for the month of October. There will be 4 challenges this month. Members can submit one entry per challenge giving them up to four chances to win the $25 gift certificate. The winner will be announced on Friday, October 29, 2010. Projects must be new for this challenge. Projects cannot be combined with any other Scrapbook Express forum challenge. By submitting to the challenge, participants give the right to the Scrapbook Express Blog team to post pictures of their entries on the winning announcement post.

Participants must have a Flickr.com account (it’s free) and will need to join the Scrapbook Express Flickr group. Participants should upload their projects and tag them with the corresponding challenge date seOct14 (It’s important that it is tagged). View the projects, chose “Send to Group” then “Scrapbook Express”.

Participants will have until the following Wednesday at midnight MT (October 20th for this challenge) to upload entries for the current week. In order for a gift certificate to be given, there must be at least 15 different entries for the month.

I hope you will join us in the challenge.

Thursday, September 23, 2010

Shaped Card Tutorial

My tutorial for this week at the Scrapbook Express blog is how to make a shaped card.

I chose to use the Quickutz Cookie Cutter Mini Album: Sugarplum Page Insert but you could use this same technique with any shape cut with the Cricut Expression, Sizzix Big Shot, Slice, or Silhouette.

To start, cut two of the same shape.


Score about 1/2" from the top on one of the shapes (this will be the back). Fold towards you.


Place adhesive only on the small scored strip on the top of the back piece. Line up both shapes, and press together along the top where you have placed the adhesive strip.


Decorate the front of the card as desired.

Bo Bunny Block Party Collection: Good Times
Basic Grey Jovial Collection: Woolies
Basic Grey Oliver Buttons
My Mind's Eye Sophie Collection: Best Things Accessories Card
Bo Bunny Cranberry Ribbon Card
Quickutz Cookie Cutter Mini Album: Sugarplum Page Insert
WeRMemory Keepers Maple Grove Clear Stamps: Celebrate
Staz On Ink Pad Blazing Red

Friday, September 17, 2010

Cards

Last month I participated in the ABC Summer Crop at My Sketch World. Every other day were card challenges so I managed to make quite a few cards. It's been a while since I was on a card making binge (not like I don't have enough already premade but they are fun).


Wednesday, September 15, 2010

New Layouts

While I have not been posting on my blog, I have been creating lots of layouts. For some reason, I've started working with double page layouts recently....something I haven't done much of in a long time.


Related Posts Plugin for WordPress, Blogger...